Royal Icing: How to Keep Sugar Flakes Off Your Work Area (update 1/20/19)
To avoid spoiling our creations from unwanted sugar flakes, we have to keep our Royal Icing decorating area very clean.
Unfortunately, sugar flakes caused by frosting drying on our fingers, piping bags, and other utensils often drop onto our work.
Even wiping up with paper towels can be problematic. Icing quickly dries on these towels, generating even more flakes on our work surface every time we pick one up.
You can, however, defeat sprinkling sugar flakes on your pretty cookies by using the following six inexpensive items:
- Use disposable piping bags in sets of 2
- Ateco 399 piping tip covers
- Pastry tips with couplers
- Snack bag clips
- Cookie turntable
- and many damp microfiber washcloths . . .
Products to Help Keep Your Royal Icing Work Area Clean
You can buy disposable piping bags online from Amazon, Walmart, bakery supply houses, and vendor sites, as well as from local hobby stores (most of which have online presence).
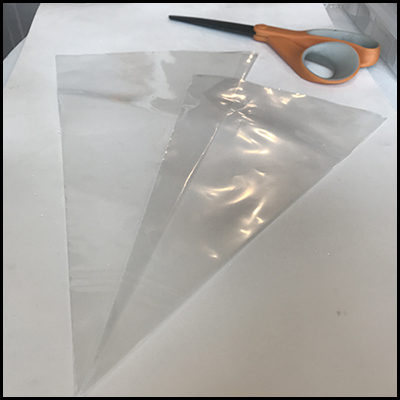
Use disposable piping bags in sets of two. Fill the first one with Royal Icing and use the second bag to cover the first, thereby trapping any icing schemers inside. To make the two bags easier to handle, I recommend that you trim the cover bag two inches shorter than the frosting bag.
Ateco makes piping tip covers that slide over the actual piping tip and the coupler holding the tip to the pastry bag. When joined to the coupler, the cover prevents frosting from leaking out of the tip.
To solve the problem of Royal Icing drying at the tip, stuff a small amount of damp paper towel into the cover so that the tip abuts the towel. Adjust this as needed.
Note that Ateco products relate to one another. If you have non-Ateco couplers, they might fit these covers, but check first. For more selections, do a Google Search on “piping tip covers,” always making sure that the covers you select match the couplers you have.
I recommend using flat snack clips to bind the tops of pastry bags. They are easy to see, use, and wash. If you can’t find them in your local grocery store, check online under the phrase “snack bag clips.” I purchase mine from IKEA.
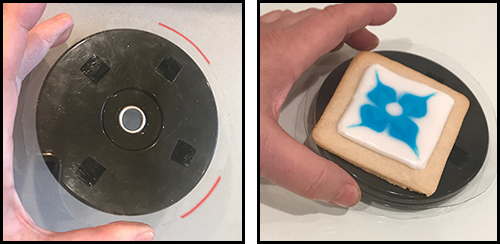
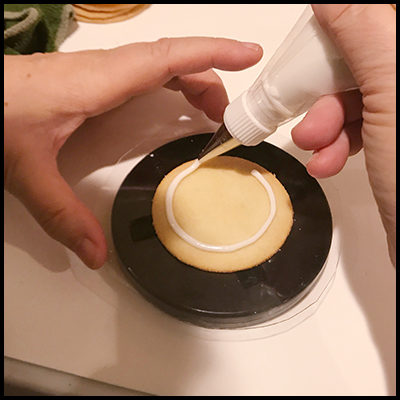
To avoid getting Royal Icing on your fingers (a sure source of sugar flakes), use a small, round turntable to turn your cookies, instead of turning them with your fingers. This a 3-inch diameter Lazy Susan Turntable by VXB Bearings is the perfect size for most cookies and your budget at around $7. (There is also a clear acrylic version, but it is not commonly in stock.)
If your cookies are small, set them directly on the turntable’s surface. For larger cookies, make a larger surface by cutting a circle from a stiff acrylic sheet, such as sold by Grafix Craft Plastic Sheets, and attaching it to the turntable with Scotch Restickable Tabs. Check your local office supply store for similar products.
Notice – the design of this turntable has changed slightly and as of January 23, 2019, I have not yet tested it. It seems to have smoother rotating properties.
Keep in mind that you clean the turntable by wiping, not dunking in dish water. If you want an extra layer of sanitation, cut a circle from parchment paper and affix it to the top with double sided tape.
Now then, to wipe away frosting as you work, I recommend keeping one or two damp microfiber “smooth” wash cloths at your side, preferably the face cloth size. These cloths are commonly available, however, if a shopping center isn’t nearby, Amazon and Walmart always have a good selection.
Using the Recommended Products
By using two disposable piping bags together, the outer one, which holds the coupler and piping tip, always stays clean and free of frosting flakes. You can even exchange the inner one without having to redo the outer one, something I find handy if I have to change a consistency.
For ease of handling, cut the top of the outer bag about 1.5 to 2-inches shorter than the inner bag which holds the icing.
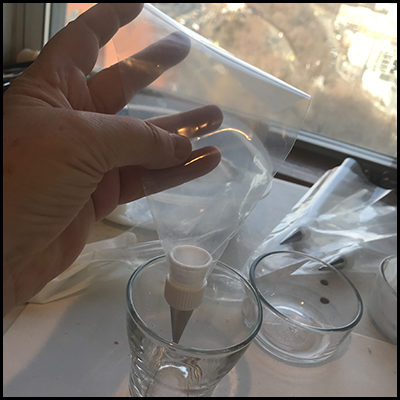
The photo above shows an outer bag complete with coupler and tip.
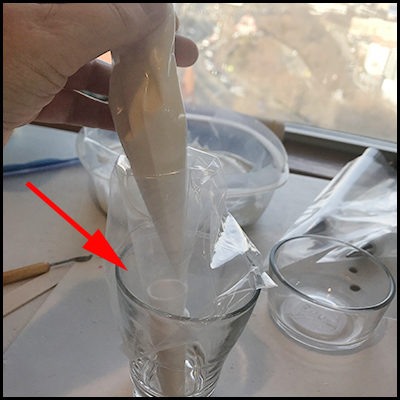
The photo below shows a filled inner bag before the tip was cut.
To assemble, snip the tip of the filled bag, then quickly slip it into the coupler as seen in the next picture. The arrow points to the assembly area that, in this case, also includes a piping tip cover.
Note: The cut tip should be a reasonable size, which is smaller than the coupler opening, but not so small that squeezing frosting out of the hole is difficult.
Once assembled, squeeze the top of the bags so frosting doesn’t escape and seal with a snack bag clip.
Note that whether using two or one bags, dried icing can fall from an open bag top.
When your icing bag looks like the picture above, make sure you seal its top completely. Without a seal, if you accidentally brush against the bag, your work area will be showered with frosting flakes. Under this condition, I seal a messy top with a snack bag clip in addition to the clip I attach to the pressure point.
Use a Lazy Susan to protect the sides of your freshly frosted cookie from being touched by your fingers and keep your fingers free of frosting. This Lazy Susan rotates with a slight hesitation. To relieve that, slip a drop or two of light oil between the bearing’s housings.
Notice – the design of this turntable has changed slightly and as of January 23, 2019, I have not yet tested it. It seems to have smoother rotating properties.
During all phases of your project, regularly wipe surfaces clean with a damp cloth. I prefer using damp microfiber washcloths, and always have two or more by my side. A paper towel is handy, but frosting drys on it, so when you lift it up, sugar flakes often fall off.
To protect the frosting in your piping tip from drying out when being used, use a tip cover or rest it on one half of a damp washcloth, then flip the other half over the tip.
Links
- Buy disposable piping bags at any number of online resources, such as Amazon, Walmart, and bakery supply houses
- Buy Ateco piping tips at Amazon or any number of online shops. To find different brands, do a Google Search on “piping tip covers“
- Grafix Craft Plastic Sheets and Scotch Restickable Tabs can be purchased at Amazon, as well as art and office supply stores
- Check online for “snack bag clips.” I purchase mine from IKEA.
- VXB Bearings is the manufacturer of the 3-inch diameter Lazy Susan Turntable Bearing. This specific bearing is not commonly sold as a cookie decorating aid.
- Buy microfiber washcloths from Amazon or Walmart. I prefer the smooth, facecloth sizes.
Article Series
For Royal Icing recipes, CLICK HERE.
For a list of all articles in this series in the order written, CLICK HERE
Questions? Comments? Additions? Corrections? Write to Karen Little at karen@Littleviews.com
Written for Littleviews-Crafts.com by Karen Little, publisher. All rights reserved, but feel free to re-publish this article after contacting Karen so she knows where to find it.
