Royal Icing: Working With Metal Piping Tips
As a recreational artist, I select my brushes and pens by size to balance the width of a line to its related area.
The same is true for Royal Icing extruded through a metal piping tip. If the line-mass balance isn’t right between design elements, the result will be tasty, but clumsy. If an extruded line is too thick for the size of a design, that design’s curves and points might not be well executed. If too thin, possibly the curves and points can’t be seen.
Like with brushes and ink, the best way to determine the extrusion sizes you need is to experiment with decorating tips. (See How to Test Royal Icing for Consistency as a reference.)
Round Metal Tips Used for Royal Icing
The icing tip sizes you use dictate the balance of your design. Using big tips to outline 5-inch cookies might look great, but if you use that same tip on 3-inch cookies, the result might be clumsy. Small tips produce delicate lines that are stunning on small cookies, but can get lost on big ones.
The tip size you use also dictates how successfully you flood icing in an area. If your tip is too small for a large area, part of your flooding will crust (harden) before finishing. If it is too large, chances are you’ll pump too much icing into your boundary, overflowing its edges.
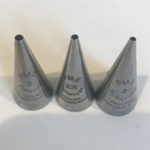
For this article, I tested a range of tip sizes from #3 down to #1, all PME tips. These numbers are comparable to other brands, but hole circumferences between brands differ.

To set up the experiment, I traced three nested cutters at 3.3-, 2.2-, and 1.1-inch. I then placed my drawings under a sheet of clear plastic, and proceeded to pipe outlines using each of my tips. (Search for “clear craft plastic” on any site that sells craft supplies.)
Note: Because of the differences in computer and cell phone monitors, the pictures here are relative to my tracings, but are not displayed as the actual size.

To begin the experiment, I piped a straight line using each one of my piping tips.
Immediately, I could see the greatest similarities were between tip #3 and #2.5, tip #2 and #1.5, and then #1 alone.
Note: Use a pasteurized or whole egg white Royal Icing recipe, possibly with a dash of corn syrup, when working with very small tips to reduce the chance of clogging. Further experimentation is up to you.

Two Piping-bag System
To save time when working with multiple tips, I use a disposable piping bag fitted with a tip coupler to hold the tip. Royal Icing goes into a second bag which fits inside of the first. The photo below shows the two bags side-by-side. Cut the tip off the second bag and fit the bag into the first. This process usually leaves the outer bag fairly clean.

A benefit to using a two-bag system is that if there is a time-lag between piping tasks, you can prevent the icing from drying out by removing the inner bag and sealing the opening by folding and clipping. You can also remove, wash, and return the tip on the outer bag, thus eliminating piping bag and icing waste.
Examples of Royal Icing Extrusion Sizes
The following pictures show the results of outlining a 3.3-inch pattern using a #3 and #2 tip, with the difference between them obvious. The thicker one would be great for creating a dam in which to flood icing, and the thinner one would look more interesting on an already flooded surface.

Smaller perimeters also require different tip considerations:
- The #3 tip makes an extrusion that is too thick for a 1.1-inch perimeter, but is OK for all 2.2-inch perimeters.
- The #2 tip makes an extrusion that looks good on all 2.2-inch perimeters, but barely works on the 1.1-inch perimeter.
- The #1 tip is the only one that looks good on the 1.1-inch perimeter.
To summarize, one cookie design might require different size piping tips and it is up to you to plan which ones are best. Testing on clear plastic like seen here is efficient and doesn’t waste cookies or icing.

Metal Piping Tips Used for Royal Icing Flooding
You also need to consider piping tip sizes for your flooding tasks.
If your tip is too small for a large area, your icing will start crusting before you finish, which causes ripples. If it is too big, you might accidentally pump so much icing into the area that it overflows the design’s boundaries.
When you use the two-bag system, if you find your flood consistency too wet (or maybe too dry), you can remove the inner bag, squeeze out the icing, remix it, then return it to the existing (or new) inner-bag. I have even been known to change colors in this way without any trouble. This reduces waste and the need for a lot of piping tips.
I usually use a #5 tip to flood a 3-or-4-inch cookie surface and a #3 tip for smaller areas. If the area is very small, I might drop to a #2.

In this example, I flooded the 2.2-inch outline by using the #5 tip.

Buying Metal Piping Tips
The type of decorative tips demonstrated here are called “round” or “writing” tips.
I like PMI tips because they are seamless and rarely stain, but they must usually be ordered online unless you live by a specialty shop.
Wilton tips are commonly found in hobby shops, but not in all sizes. If you want to standardize on a range of Wilton tips, you need to order online.
Consider other tip manufacturers, such as Ateco, but no matter what you pick, buy seamless tips as they make the best extrusions.
When you buy online, it is easy to get confused about tip size because photos make very large and small tips look like the same size. Cookie-sized round tips are commonly numbered 000 through 10, with #2 through #5 common. Confusingly, Ateco has an 800-series set which refers to numbers 0 to 9, all of which are too large for your cookie needs.
Very tiny tips with numbers like 000 and 00, extrude spider-web-like lines and I have yet to find a practical reason to use them.
Alternatives to Metal Piping Tips
Do you actually need tips?
Some Royal Icing artists snip the tip off disposable plastic cones and set right to work, usually on 5-inch or larger cookies. Hand-rolled parchment cones can be used for very delicate work, but the people who use them have much more skill than I do.
Rest assured, however, that metal tips will provide excellent extrusions for all your piping needs reliably every time you use them.
Links
- A Tip about Tips, by Sweet SugarBell, May 10, 2012: Demonstrates the differences between brands related to tip size
- Decorating by Numbers, by CakeCentral. This site has the best collection of piping tips labeled by size that I’ve ever seen!
- Decorating Bag Tips, by Wilton. Short article that describes tip categories.
- Videos on How to Use Piping Tips: Note that Royal Icing demands attention to consistency depending on what tip and tip size you use. You can, however, learn how to use tips from demonstrations using butter cream frosting, although consistency information will not be the same.
- How to Decorate with Royal Icing – Top Ten Tips, by Sweetopia. Excellent information, plus a video, on how to use different sized round tips to apply Royal Icing decorations on sugar cookies.
- Ateco Pastry Tip Examples: Page down on this PDF file to see photos of Ateco’s pastry tips in the sizes discussed in this article, plus the rest of their line.
- The Restaurant Store: While The Restaurant Store doesn’t cover all brands, it does organize and display an extremely wide-range of decorating supplies. Browse it and be amazed at what you didn’t know was available that you suddenly realize you need!
- Plastic Food Storage Solutions: Also at The Restaurant Store are food storage containers that are much larger than you might find at a local Target or Walmart. Because of surface areas, large rectangular containers can offer the perfect solution to storing layers of decorated sugar cookies.
Questions? Comments? Additions? Corrections? Write to Karen Little at Karen@Littleviews.com
Written for Littleviews-Crafts.com by Karen Little, publisher, on July 13, 2019. All rights reserved, but feel free to re-publish this article after contacting Karen so she knows where to find it.