Royal Icing: First Steps in Learning Cookie Decoration

Royal Iced sugar cookies can be miniature works of art. Because cookies tend to be small (maybe 3-inches in diameter), learning how to frost them seems easy.
Want to learn? There are numerous tutorials on the web, including formal tutorials featured on Craftsy.com and on YouTube by pros like Julia Usher, plus informal ones produced by people who simply want to share what they know so you can grow.
I began my quest to learn Royal Icing techniques in late December 2017 by signing up with Stephanie Kappel’s Craftsy course. From there, I sought out all the written and video information I could find. Unfortunately, while I’ve made some pretty cookies, I found that organizing Royal Icing sessions, perfecting techniques, and deciding upon a design style is difficult at home without expert guidance.
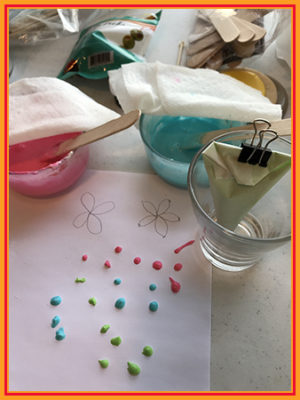
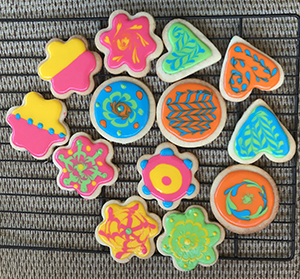
The photo above shows one of my early sessions where I practiced mixing different Royal Icing consistencies in hopes that I could produce perfectly round dots. The photo below shows a successful batch, although my skill is not at “pro” level.
I need to learn more and with my husband away on a trip, I can devote 8 days to uninterrupted study, which this series of posts documents. During this time, not one cookie will be produced. Instead, training materials, such as clear acrylic sheets, will be used exclusively. Baking cookies and practicing on them is time consuming, especially when the purpose of learning centers around frosting consistency, piping bags, and area flooding, not the cookies themselves.
The following is an outline of the topics to be shared. Some might be dropped by the end of 8 days, while others added.
- How to Set Up a Learning Session and How Much Time You Should Spend Doing it: The fun part of starting is acquiring all the supplies. The maybe not so much fun is the time you need to spend learning the craft.
- Perfect Royal Icing Frosting: There are generally two types, with and without corn syrup. I prefer the corn syrup variety and in this step, I tell you why.
- Piping Bags for Royal Icing: You can make the bags out of parchment paper, use plastic cones that can be fit with frosting tips, or simple Baggies. I’ll discuss the pros and cons of each.
- Holding Piping Bags: If you don’t hold the bags correctly, or if your icing is lumpy, squeezing a bag can squish frosting all over the place. I’ll discuss how you can practice until you find a bag-holding style or styles you like.
- Royal Icing Consistency: Royal Icing is the paint used to decorate cookies. If you do not mix your paint correctly, your decorated cookies will be a mess. I’ll show you how to figure out consistency issues no matter what frosting recipe you use, as well as tell you the differences.
- Flooding Royal Icing: The technique you learn here (taught by Julia Usher) is the fastest. Forget about piping bags. Spread your frosting with a spoon and a paint brush.
- Wet-on-Wet Designs: These designs are based on ancient arts, which in Turkey are called Ebru, or Turkish Marbling Art. This type of design produces the thinnest frosting crust, and makes beautiful displays without a lot of extra design training.
- Piping Outlines and illustrations: This is what most people want to achieve when working with Royal Icing. Hopefully, by this point, I can show you how it is done.
Article Series
For Royal Icing recipes, CLICK HERE
To see a list of all articles in this series, CLICK HERE
Questions? Comments? Additions? Corrections? Write to Karen Little at karen@Littleviews.com
Written for Littleviews-Crafts.com by Karen Little, publisher. All rights reserved, but feel free to re-publish this article after contacting Karen so she knows where to find it.

