Category: Royal Icing and Sugar Cookie Decoration
Royal Icing: Assemble Supplies

Obviously, in order to learn a new skill at home, you need to be organized.
The lists that follow identify what you need for your practice sessions, so use them for your shopping list With the exception of cookie making supplies, you’ll be all set.
After learning how to standardize your frosting consistencies through these tutorials, you will continue to practice your piping skills so you can create superb wet-on-wet designs, cute illustrations, transfers (3D sugar candy you can place on frosted cookies and cakes) and more all before you touch a cookie.
If, however, you live dangerously (like I did prior to creating this tutorial series), make cookies to frost the moment you understand the basics. No matter what they might look like, they will be good to eat and your family will love you for your effort.
Major Ingredients for Royal Icing
◊ Powdered Sugar finely milled:
⇒ A 2 pound bag of finely milled (10 X) powdered sugar.
⇒ An extra bag of powdered sugar for use in adjusting consistency.
◊ Meringue powder or egg whites, depending on your recipe.
◊ Flavoring, such as vanilla, almond, etc. Coordinate this with the flavoring used in your sugar cookies.
◊ Gel food coloring: Note that for small batches, you dip a toothpick into the coloring, then swish it in your batch. Wilton’s 1/2 ounce food coloring containers are easiest to use for this procedure.
Items Used to Testing Frosting Consistency
◊ Small, inexpensive timer: Timers can be purchased for as little as $5. While you can a sports timers or your cell phone’s timer, you’ll get sticky sugar all over them. Dedicate an inexpensive timer to this job.
◊ Inexpensive humidity monitor: The humidity of your home changes throughout the seasons dictating the amount of time you manipulate your Royal Icing. The more humid, less water, while very dry conditions require more. Be mindful of your environment and adjust your batches as needed.
◊ Toothpicks, bamboo skewers, or similar objects: Use these for testing consistency, popping unwanted bubbles, adjusting piping, and creating designs.
◊ Fan: Use a fan to quickly dry your frosted cookies to prevent popped bubbles which can form over time without you suspecting that they will, surface cracks, and color bleeding. Use a fan even when you are just practicing so you understand what the result of your work will look like.

Practice Sheets
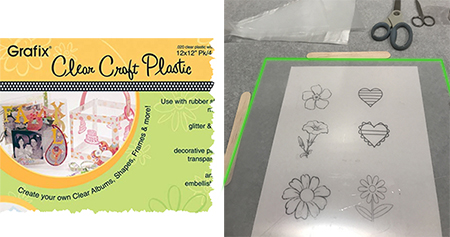
◊ Plastic sheets: You can never make enough cookies to practice your Royal Icing skills, so instead, practice on clear plastic sheets. Best, you can put patterns under these sheets to develop more complex piping skills. Better yet, after your practice Royal Icing dries, you can eat it like candy.
◊ Patterns: To start, pipe over lines, boxes, and circles. As your piping Print or draw patterns to place under a plastic sheet for use in tracing. As you progress, practice on more complex patterns, such as though you draw yourself, or you find elsewhere, such as in simple coloring books, Google image searches, and perhaps Pinterest.
Major Appliances
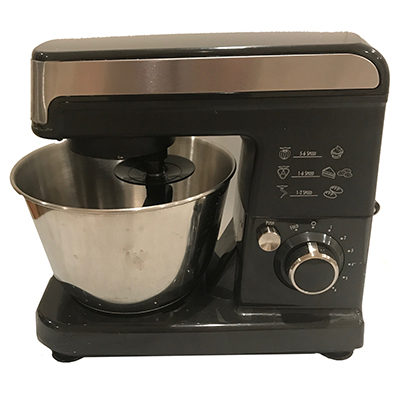
◊ Stand mixer with paddle blade, powered by 300 watts or more. While you can mix Royal Icing by hand (but probably not with a hand mixer), a heavy-duty mixer with a flat paddle blade attachment is more appropriate. Hamilton Beach sells one for under $100.
◊ Optional: Food-grade spray paint gun: A delightful way to design Royal Icing on sugar cookies is to use stencils and an airbrush, such as the one designed by Julia Usher. Invest in this option after you’ve mastered your consistency skills.
Piping Bags
◊ Inexpensive, disposable bags: During your learning period, you’ll throw away many piping bags, so buy inexpensive ones. Check online for price comparisons, starting with 12-inch bags in a pack of 100 or 200. As you’ll only use a few inches of Royal Icing at a time for most testing procedures, you’ll probably cut the top have of your bags off to make them easier to handle.
◊ Parchment bags: I learned by using using “fold it yourself” parchment bags that are convenient and very inexpensive. This topic will be covered under a separate tutorial, however, as there are pros and cons to how they are used. If you want immediate information, however, search the web on the phrase “making parchment piping bags.”
◊ Sandwich-sized plastic bags: You can make mini-piping bags out of sandwich bags by cutting a bag into quarters and snipping the remaining corner off.
◊ Binders: These include small snack-bag clips, rubber bands, and even transparent tape. Note that plastic piping bag bands are too large on bags that hold small batches.
Piping Tips and Spreaders
◊ There is no hole standard for piping tips, so start with a size 2, 3, and maybe 4 of any available brand. Sizes 1 and below are too small for this tutorial and should only be used when you are skilled at mixing the proper consistencies as they clog easily. Buy 5 tips of each size.
◊ Piping tip cleaning brushes
◊ Tip couplers to hold tip in place: Be aware that washing tips and couplers takes a lot of time, especially if you allow the tip to dry. You might also need a lot of them depending on how many colors and consistencies you need for a project. For starters invest in 5 for each tip size you buy, or you can use the alternative method, which is . . .

◊ Scissors: Instead of reaching into your sewing drawer, keep scissors (tiny and standard) with your Royal Icing equipment. They will become coated with icing over time and their surfaces require scrubbing if the icing is left to dry before clean-up time..
Preparation Equipment
◊ Several small mixing bowls, maybe 6 to 8. They should be large enough to hold at least one and a half to two cups of frosting.
◊ Air-tight storage bowls of various sizes to hold your main batch of Royal Icing.
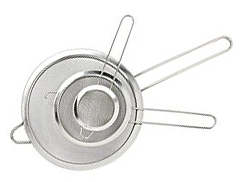
◊ Fine, mesh sieves, small, medium and large. Because I live in a seasonally humid area, I sift powder sugar before use, even when I use a small amount of it to adjust consistency. I also run premade, stored Royal Icing through a sieve before using it again to make sure dried flakes do not drop into the refreshed batch. This is especially important when using very small piping tips, size 1 of any brand and below.
◊ Toothpicks or wooden skewers
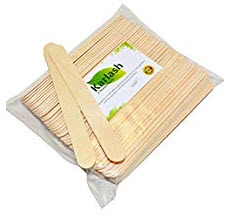
◊ Medium-sized, wooden craft sticks (also known as “tongue depressors“): Used as disposable “spoons” and stirring devices.
◊ Silicone mixing spoons or spatulas, various sizes: Have several.
◊ Slim offset (bent) spatulas: Use these for moving and lifting cookies to avoid touching wet frosting.
◊ Glass, food grade spray bottle: Spray small amounts of water into Royal Icing for thinning purposes.
◊ Paper towels: In addition to continually wiping up, I also dampen sheets and lay them over the top of the Royal Icing in small bowls under use. This keeps the icing from drying out and the sides of the bowls free from dry icing flakes.
◊ Waste paper basket
◊ Large bowl of hot, sudsy water: This you’ll probably keep in your sink. Simply make sure that the water is hot and sudsy as Royal Icing dries quickly and can be difficult to get out of utensils or tips unless you soak them immediately after use.
◊ Racks or trays of some type to hold cookies while the Royal Icing dries
◊ Gallon sized plastic bags: Cut these up so you have two sheets made from the front and back, instead of one bag. Use these to cover waiting frosting during your production cycle. The heavier plastic provides an easier-to-handle frosting protector than plastic wrap.
◊ Plastic wrap: You’ll find a need for plastic wrap, however, the problem with it is that on the surface, Royal Icing dries quickly. If you protect it with plastic wrap, flakes start forming where the wrap touched the frosting causing the wrap to shed dried flakes. If dried flakes land in a mixing bowl, you’ll usually need to strain the frosting so it spreads smoothly.
◊ Damp washcloth: You’ll use this often to keep your hands free of frosting and dried frosting flacks.
◊ Recommended – heavy plastic disposable table cloth: Royal Icing drys like cement. To save time and keep your work area clean after finishing a project, do it on a disposable table cloth.
Article Series
For Royal Icing recipes, CLICK HERE
To see a list of all articles in this series, CLICK HERE
Questions? Comments? Additions? Corrections? Write to Karen Little at karen@Littleviews.com
Written for Littleviews-Crafts.com by Karen Little, publisher. All rights reserved, but feel free to re-publish this article after contacting Karen so she knows where to find it.
Royal Icing: Planning How to Learn Your Art
OMG OMG, you mean I have to learn all this? That is what almost every online tutorial writer hopes you can avoid.
In the case of making and using Royal Icing there is, in fact, a lot to learn. Unlike butter cream icing, where all you have to do is mix and slather, Royal Icing can be shaped by your hands in numerous ways, with each way demanding different conditions and skills.
It is my hope that I can pinpoint what you need to learn in a way you can easily learn it. Of course, you need to practice. I promise, however, your practice will be easy.
Begin your practice by observing beautifully decorated sugar cookies and do so for several days until you identify the decorating styles and colors you most like. After you’ve identified your creative objectives (you probably will have more than one), you can begin your practice sessions.
Planning all starts with the excitement of envisioning the finished cookies. The following Pinterest links, which I collected over months, highlight my own design interests. Feel free to adopt some as your own:
Cookie Lace and Embroidery (highly complex Royal Icing designs)
Illustrations (many of these illustrations can be piped on cookies)
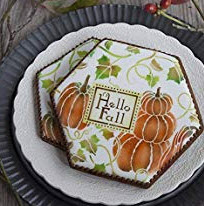
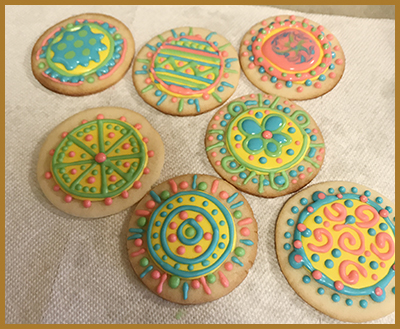
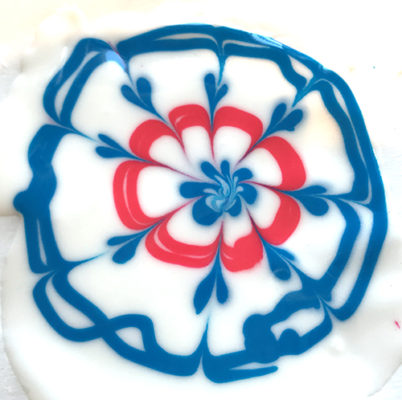
Perhaps now, when you look at the following photo, you’ll understand where I got my inspiration!
When looking at beautiful examples, note the details and try to figure out how they were made:
- Design style: Royal Icing can duplicate the ancient art of ebru, where colors sitting in a liquid medium are dragged through one another. Illustration techniques, like line drawing, can also be used, and patterns can include cute images or simple shapes and dots
- Color: If, for example, you fall in love with designs outlined in black, you’ll require more study on how to achieve it than designs outlined in pastels.
- Piping style: Do you like very thin, intricate piping strokes like the Cookie Lace examples I linked to above? Or do you like thicker outlines that are easier to achieve?
- Dots: God, I love dots! They require special skills, however, unrelated to piped lines.
- Thick or thin: I love very flat, smooth cookie frosting, possibly jazzed up with dots. Other people love thick frosting built up with piping and appliqued Royal Icing objects, like flowers.
- Design subjects: Do you like cute comical figures? Flowers? Insects? Plants? Seasonal images? Avant garde? Random?
- Commercial subjects: Want to reproduce commercial logos or representation of real things, such as a can of soda?
- Paint or Pipe: Do you love smooth Royal Icing under painted images, or do you prefer the somewhat 3-dimensional look of piped icing?
Your design and color choices all demand specific planning which is what you’ll study in this tutorial series.
Details often seem overwhelming to a beginning Royal Icing decorator, especially if that decorator does not have all the equipment and supplies needed. To address that, review the check-list in the second article of this series and stock up: Royal Icing: Assemble Supplies Before Beginning to Learn
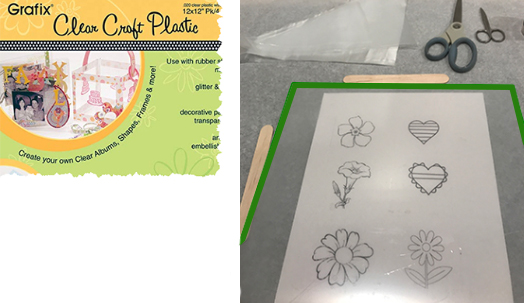
Accept that you need planning abilities as well as Royal Icing application skills. Hopefully, this series will help you learn everything. The secret behind my belief? Do not start by baking a lot of sugar cookies for practice because you can never make enough. Instead, follow a suggestion made by Julia Usher. Frost clear plastic sheets that lay over patterns for you to trace. When done, wash the frosting off, or let the frosting harden and eat it like candy.
The images below show Grafix “Clean Craft Plastic” over printed images for tracing. I made the green outline in the photo so you can see the edges of the sheet, otherwise, they are invisible.
I started my own Royal Icing design odyssey by first learning how to flood the frosting base into a smooth, shiny surface. When dry, I proceeded to freehand decorate the hardened base using numerous colors piped with handmade parchment piping cones. Unfortunately, while the finished cookies looked cute, they did not live up to my expectations. Fortunately, friends and family liked to eat them.
The problem that held my skills back was that I was not organized. During every cookie frosting session, I missed critical items and my work area turned into a sticky mess. Yes, I produced cookies, but did so along with frustration. Hopefully, this series of tutorials will help you recognize pitfalls in order to avoid them.
Costs of Becoming a Royal Icing Artist
Unlike cake decorating, sugar cookie decoration is inexpensive. Your most expensive equipment is a heavy-duty stand mixer, such as with an excellent Hamilton Beach model under $100. You can, however, spend much more, making sure that your mixer is powered by at least a 300 watt motor.
Cash Investment in Practicing: Buy two to three, 2-pound bags of extra-fine (10X) powdered sugar. In my area, three bags of powdered sugar cost around $10 total. A boxed set of 12 Wilton gel colors runs around $12 and a 1-pound bag of meringue powder, around $17. You should become an expert for under $30.
Time Investment in Practicing: Gradually build your skills. Because you will not be practicing on real cookies and you can schedule short practice sessions using your pre-made Royal Icing, you’ll have time for short practice periods, rather than long ones that include a lot of baking and related cleanup.
The remaining tutorial articles in this series address each skill set. As it develops, I will cross-link information, plus update earlier articles as needed. If you’d like to have a report on the progress of developing the series, drop me an email at Karen@Littleviews.com and I’ll send you updates as well as ask for your opinions and insights.
Article Series
For Royal Icing recipes, CLICK HERE
To see a list of all articles in this series, CLICK HERE
Questions? Comments? Additions? Corrections? Write to Karen Little at karen@Littleviews.com
Written for Littleviews-Crafts.com by Karen Little, publisher. All rights reserved, but feel free to re-publish this article after contacting Karen so she knows where to find it.
Royal Icing: First Steps in Learning Cookie Decoration

Royal Iced sugar cookies can be miniature works of art. Because cookies tend to be small (maybe 3-inches in diameter), learning how to frost them seems easy.
Want to learn? There are numerous tutorials on the web, including formal tutorials featured on Craftsy.com and on YouTube by pros like Julia Usher, plus informal ones produced by people who simply want to share what they know so you can grow.
I began my quest to learn Royal Icing techniques in late December 2017 by signing up with Stephanie Kappel’s Craftsy course. From there, I sought out all the written and video information I could find. Unfortunately, while I’ve made some pretty cookies, I found that organizing Royal Icing sessions, perfecting techniques, and deciding upon a design style is difficult at home without expert guidance.
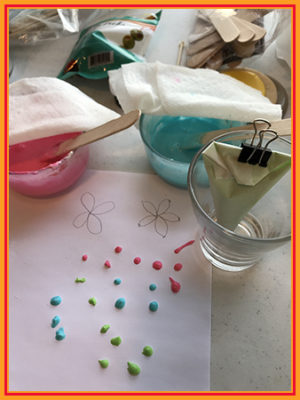
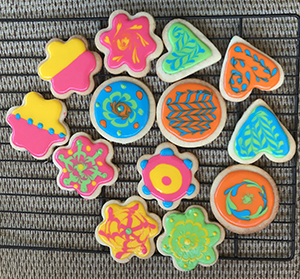
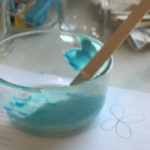
The photo above shows one of my early sessions where I practiced mixing different Royal Icing consistencies in hopes that I could produce perfectly round dots. The photo below shows a successful batch, although my skill is not at “pro” level.
I need to learn more and with my husband away on a trip, I can devote 8 days to uninterrupted study, which this series of posts documents. During this time, not one cookie will be produced. Instead, training materials, such as clear acrylic sheets, will be used exclusively. Baking cookies and practicing on them is time consuming, especially when the purpose of learning centers around frosting consistency, piping bags, and area flooding, not the cookies themselves.
The following is an outline of the topics to be shared. Some might be dropped by the end of 8 days, while others added.
- How to Set Up a Learning Session and How Much Time You Should Spend Doing it: The fun part of starting is acquiring all the supplies. The maybe not so much fun is the time you need to spend learning the craft.
- Perfect Royal Icing Frosting: There are generally two types, with and without corn syrup. I prefer the corn syrup variety and in this step, I tell you why.
- Piping Bags for Royal Icing: You can make the bags out of parchment paper, use plastic cones that can be fit with frosting tips, or simple Baggies. I’ll discuss the pros and cons of each.
- Holding Piping Bags: If you don’t hold the bags correctly, or if your icing is lumpy, squeezing a bag can squish frosting all over the place. I’ll discuss how you can practice until you find a bag-holding style or styles you like.
- Royal Icing Consistency: Royal Icing is the paint used to decorate cookies. If you do not mix your paint correctly, your decorated cookies will be a mess. I’ll show you how to figure out consistency issues no matter what frosting recipe you use, as well as tell you the differences.
- Flooding Royal Icing: The technique you learn here (taught by Julia Usher) is the fastest. Forget about piping bags. Spread your frosting with a spoon and a paint brush.
- Wet-on-Wet Designs: These designs are based on ancient arts, which in Turkey are called Ebru, or Turkish Marbling Art. This type of design produces the thinnest frosting crust, and makes beautiful displays without a lot of extra design training.
- Piping Outlines and illustrations: This is what most people want to achieve when working with Royal Icing. Hopefully, by this point, I can show you how it is done.
Article Series
For Royal Icing recipes, CLICK HERE
To see a list of all articles in this series, CLICK HERE
Questions? Comments? Additions? Corrections? Write to Karen Little at karen@Littleviews.com
Written for Littleviews-Crafts.com by Karen Little, publisher. All rights reserved, but feel free to re-publish this article after contacting Karen so she knows where to find it.
How to Learn Royal Icing Wet-on-Wet Techniques Without Cookies
I am a relatively new Royal Icing cookie decoration hobbyist who has struggled to figure out how to learn techniques on a limited number of cookies.
Yes, I know that many cookie decoration teachers recommend practicing piping on paper before attempting it on cookies, but it never occurred to me that wet-on-wet techniques, where you create patterns by dragging colors over each other, could also be learned that way.
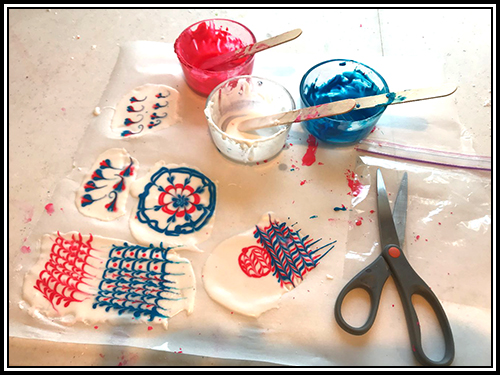
The picture below shows my “instruction” area after finishing an hour or so of experimentation. It includes a long sheet of parchment paper (I actually went through several) and three colors of Royal Icing in flow consistency. It also shows my main tools: tongue depressors purchased at Michael’s, plastic sandwich bags, a scissors, and unseen, wooden toothpicks with sharp points.
I used the corn syrup-based Royal Icing recipe (see HERE on Julia Usher’s site), but you can use any with the knowledge that the corn syrup recipe requires you to work faster.
I prepared all three colors using the same flow consistency, allowing the Royal Icing to flood areas. White for the pretend “cookie,” and two other colors which I used to experiment with pattern.
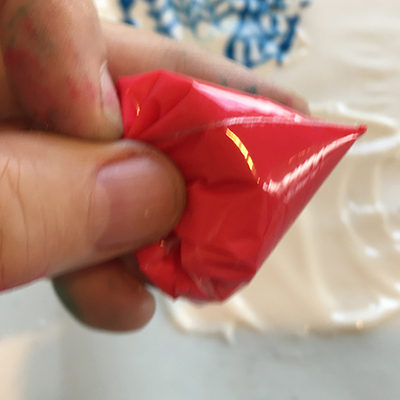
To get started, I created ultra-small piping bags out of disposable, plastic lunch bags. I did this by cutting off the top of a bag, then cutting the remainder in half, leaving a corner on each remaining piece. I could have used standard piping bags with tips or hand-made parchment bags, but my objective was for a quick and easy experiment and these little baggie parts worked.
I filled each little bag with about a tablespoon of frosting, squeeze off the top (I twisted the bag, then clamped it with a small office clip) and when everything was ready, cut a small hole at the point.
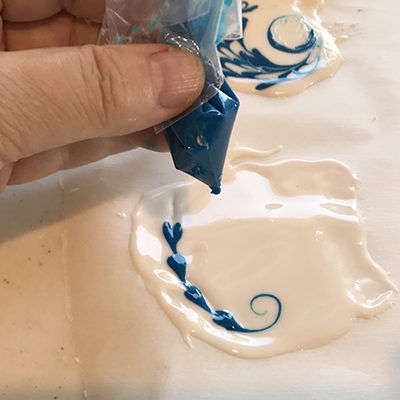
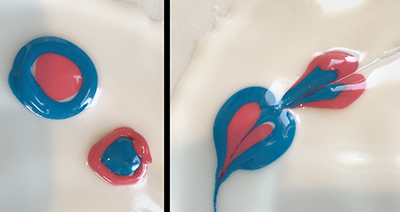
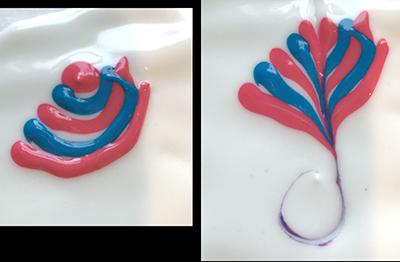
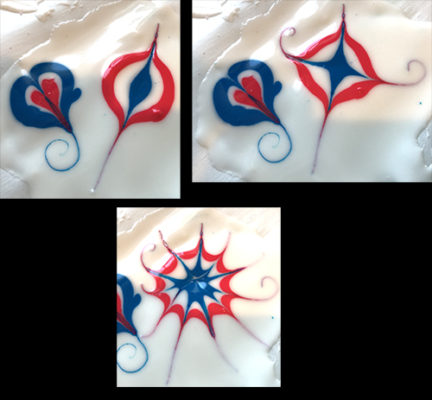
To practice, I smeared white Royal Icing cookie frosting on the paper, then proceeded to test wet-on-wet techniques by piping colored frosting on the white and dragging a toothpick through the mixture.
The following are pictures of “the mix” and resulting “drag.” Keep in mind that I am just learning how to do this, so these pictures look honest, but not polished.
My next articles on this subject will demonstrate how to create wet-on-wet designs based on pulling frosting into and out of circles and pulling frosting in opposite directions on lines.
Don’t wait for my upcoming articles if you need to experiment, however. Frosting parchment paper not only provides an excellent canvas for experimentation, after 24 hours, the dried frosting can be peeled off as candy and the process also teaches you how to make transfers, as discussed on my article, Create Royal Icing Designs Without Cookies.
More information on this subject is posted in Royal Icing Paisley, Mandela, and Wet-on-Wet Design Links, found under my Crafts tab.
Questions? Comments? Please write me at Karen Little at Info@Littleviews.com.
Written for Littleviews-Crafts.com by Karen Little, publisher. All rights reserved, but feel free to re-publish this article after contacting Karen so she knows where to find it.

